What to Do While Your Irobot Braava Jet Not Spraying Water
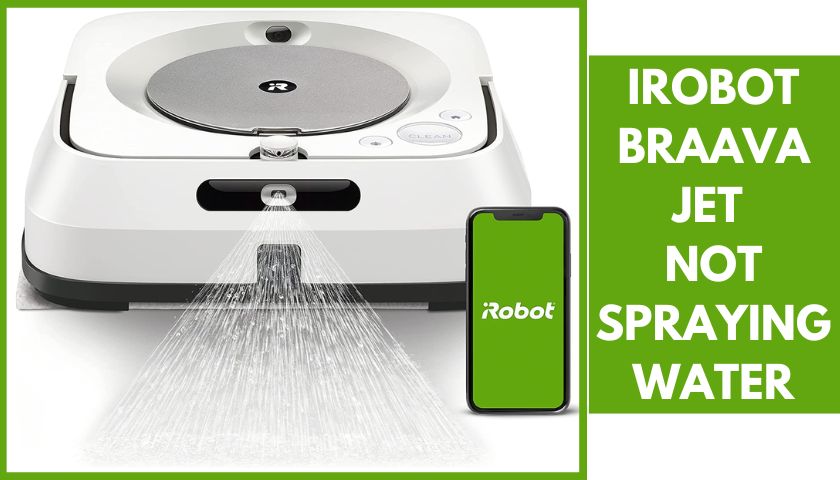
Your iRobot can suddenly stop working amid the cycle for much rationality. Mopping robots usually require a clean nozzle with a damp cloth before spraying water at the beginning of the cycle. If you are unaware of this, you might be searching for a solution for an Irobot Braava jet, not spraying water.
The Irobot mopping robot cannot spray water for the clogged nozzle. Most of these reasons are badly interrupted into the entire working cycle of the iRobot. But the good news is all these issues can be solved and troubleshoot easily.
But what’s the remedy? Did you wonder? Let’s look for some cheap solutions that won’t cost you more.
Contents
Why Is the Irobot Braava Jet Not Spraying Water?
There could be several reasons why the iRobot mopping robot is not spraying water. Here I find a few common possibilities; let’s see them at once.
1. Empty the Water Tank
The water tank is empty or not properly filled. Ensure the tank is filled with water up to the designated fill line. Since it is a different matter, not every i-jet water tank capacity is the same. It would help if you looked for the manufacturer’s specifications to know the exact measurement.
So, fill the tank with the right measurement and go forward. Check-in some liquid capacity of the iRobot jet.
2. Spraying Nozzle Is Clogged
One of the common obstructions you may suffer from is clogged or dirty nozzles. iRobot mopping tool nozzles are usually clogged with accumulated dirt, junk, and other debris. Clean the nozzle, which is usually located on the front side of this sprayer.
3. Wrong Installation of the I-robot mopping robot
The wrong installation of the I-robot mopping robot could also be the reason for this. Check out each installation part of the sprayer before you start working on it. Losing parts of the I-robot often create obstructions and make it impossible to continue working as it should.
4. Low Battery Power
The battery of the iRobot jet is very low. The low battery power of the jet cannot function properly. They’re not good at working as well and show some disturbing attributes.
For example, you may see that the charging capacity of the jet does not last like the previous one. It takes around 20–30 minutes per charge.
But a normal iRobot jet can last 60 minutes or more per charge. In that case, you should charge the device and try it once again. On the other hand, you can also reset the battery and restore factory settings.
How to Fix an iRobot Braava Jet Not Spraying Water?
I-robot is a mop that is run through a battery-powered device. This device uses water and detergent to clean the entire home. This machine then cleans the dirt with the help of a soft brush scrubber.
So, whenever this amazing device at your home suddenly stops working, certain obstructions happen here. Below are to include:
1. Fixation of No Water Coming Out of Jet
Among all the probable defects someone feels pain about the jet is its abrupt water absence. Your mopping robot will not spray sufficient water whenever you push the turn-on button. In that case, ensure that the tank is seated properly and the red float doesn’t stick in the middle.
If you find that the float is stuck, then clean it using a paperclip or toothpick. Another way of fixing the iRobot mopping robot floating problem is to place the tank under running water for a few seconds.
2. Fixation of Inconsistent Water Spraying
Sometimes the Braava jet’s water cannot provide sufficient water. You may notice that the sprayer’s yellow tip on the cover has become clogged. At that point, the only solution is to clean the clogged dirt with a paperclip or toothpick. Besides, clean the tank under running warm water for a few seconds.
3. Clean Out the Nozzle Cap
If the Braava is still not giving you sufficient water, and you’re disappointed, this is for you. Check out the nozzle cap again. It may be closed by insufficient dirt and clogged. To clean that junk, all you need to do is apply simple tricks.
- First, remove the water tank.
- You’ll find here a nozzle cap; unscrew it.
- Now, pick a paperclip/toothpick to clean the debris
- After finishing the cleaning job, screw the nozzle cap back. Finally, replace the water tank.
4. Replace Any Spoil / Damage Nozzle
It will need to change if you find any damage or a spoiled nozzle. You can confirm your order by iRobot’s official website or a retailer selling products to buy a new one. A replacement cost is around $10-$15.
5. Check The Clean Pads Are Damped / Not
Whenever you’re using the cleaning pads of the iRobot jet, check out the machine. Sometimes it shows you a green light, meaning those pads are too wet and require more time to dry. Once you notice the red light comes from the machine, it means this one is ready for further use.
6. Dirty & Filthy Water Tank
The iRobot mopping robot is commonly disturbed when the water filter becomes dirty and filthy. It often retains a mopping robot to spray water consistently.
However, the common scenario of this obstruction is the user falling and having trouble cleaning the floor properly. So, what to do then? Clean out the tank with warm water and soap.
It would be best if you use a mixture of vinegar and water. Ensure to add both vinegar and water in the proper amounts thoroughly. Then rinse the entire tank with clean water before using it again.
7. Narrow Spraying Nozzle Problem
Sometimes you may feel that your iRobot Braava isn’t spraying water sufficiently. Especially if your mopping robot is attached to a thin nozzle for spraying water in a very wide area, at that point, use a narrow spraying nozzle in high-traffic areas.
Related post: Irobot Braava Jet Troubleshooting
How to Troubleshoot an iRobot Braava Jet Not Spraying Water?
Sometimes your iRobot mopping tool doesn’t spray water for some manual problem. And those manual problems are created by human beings by their unconsciousness. You may now ask what they are.
For example, I can tell you about the improper water tank filling issues. Most users, especially beginners, make mistakes and often become confused about the right measurement of the filter.
If the water tank is over-flooded with water or not properly filled with the right amount, you cannot work with it. At that point, you need to troubleshoot the machine to solve this inconvenience.
1. Check Out the Cleaning Settings
Most robot mops have an option to both wet and dry out the floor swiftly. In this regard, ensure you’re setting up the robot mop app correctly.
Again, users cannot even set their home as a no-mop zone. Also, be careful to start mopping the floor with the robot mop on a carpet or a rug. Because doing such kinds of acts will confuse the sensors and create difficulties during the mop time.
Adjust the water level of the robot mop so that you can ensure it’s not too low. Besides, try to clean the floor with the highest settings to check if that helps.
2. Inspect Correct Mop Heads
Another troubleshooting is to use the correct mop heads. A wrong mop head can’t produce sufficient water, well. It often causes trouble, like dry mop head issues, inadequate water production, etc.
Therefore, I suggest you use wet mop heads for the mopping robot. The one-time use of mop heads is not as great as others. It is often painful to use the latter.
3. Ensure Using Sufficient Water Float
A water float is used to hit off how much water your robot mop has. It often causes damage or gets stuck inside the mopping robot machine, letting it read out the wrong measurement all the time.
Sometimes the robot mop may not be able to release water properly. To fix it, find out the exact location of the jet and ensure it can easily move up and down.
Some mopping robots or robot mops come with two electrical probes. Those probes are used to measure the water level.
So, if you are mistakenly unable to measure the right amount, unpredictable corrosion or damage may occur. Again, try to clean out these two metal probes or plates that are too shiny and clear.
4. Unclog The Pumps on the Braava Mop
After trying all these, if you are still unable to solve the problem, follow this one. Unclogging pump is a normal defect that can be a significant reason your robot mop isn’t working.
Robot jets come with pumps or hoses that trigger the water to come off. It happens when you’re using a floor cleaner which isn’t recommended. An unrecognized or unknown pipe cleaner glues the water tube and inhibits the water from flowing through.
As a solution, you can try out the below steps with some basic tools. This is a general way to clean the accumulated dirt from the pump.
- Unplug the charger station and remove the mopping robot
- Now, start from the base. Find the clog at its end. Here you get three screws underneath the machine.
- Unscrew this small stuff, and separate the pump hose from the automated home cleaning device.
- Clean and scrub the clogged dirt from the pump
- Wipe off all the dirt and reinstall it, part by part.
Frequently Asked Questions (FAQs)
Why Is My Braava Jet Not Moving?
Your mopping robot is not moving due to some common errors. It can happen when the jet water tank is not filled with enough water.
Some Braava jets are not properly installed, and the spraying nozzles may be clogged. Diagnose all of these complications immediately to fix them. Besides, it may not move when the wheel tread has worn off. The only solution to this problem is replacing all the parts, especially the wheel tread.
How Do You Clean Braava Spray Nozzles?
To clean the Braava spray nozzles, you need to use a damp cloth or DIY cleanser. You can use a damp sweeping pad or any washable mopping pad. Both of these pads work greatly to wash off the interior of the Braava spraying nozzles. Remove the dirt from the unit if it is tightly covered inside the nozzles.
Furthermore, soak the nozzle in white vinegar for 4 hours. Soaked the nozzle again in a clear one in CLR for 12 hours. Flush them both with vinegar and CLR. Lastly, put the nozzle under the vacuum to dislodge the clogs.
How Do I Reset My iRobot Wet Mop?
If you want to reset your iRobot wet mop, there is only one way. Take a minute to press and hold the “Home button.”. Next, press the “Spot” clean button on the robot for 10 seconds. Leave the button when the entire process is done.
Why Is My Braava Jet blinking Red?
Your Braava jet is blinking red for the charging issues. It is a common problem on most mopping iRobot charging systems. If a mopping robot blinks about 7–8 times without showing any valid reason, the common reason is that you’re not using the authorized I-Robot battery and charger.
Make sure to use an authorized I-Robot battery and charger. Also, don’t forget to check the charger capacity by trying out different appliances or different outlets.
How Do I Reboot My Braava Jet?
For all types of robots, a mop has a very common button. It is known as Dock and spot buttons without any green dot. Now, press and hold the “Home and spot clean” buttons to reboot the machine.
Final Words
That’s all about troubleshooting and solving the issues that anyone faces when an iRobot Braava jet not spraying water. It may happen for many reasons. Clogged stuff may be inside the compartment, or some parts may break away.
So, it would be best to confirm using either a damp, washable damp mop pad every time. Remember that this artificial mopping pad will not spray water unless you’re not using a clean, dry pad.
Always ensure that you properly fill the water tank that comes with this one before running. Ensure not to stop or move the mopping robot amid the work.


![How to Attach a Swiffer Wet Pad? [Learn to Do It Correctly]](https://mopsreview.com/wp-content/uploads/thumbs_dir/How-to-Attach-Swiffer-Wet-Pad-20ohih1eaj9c1n0speeheg51u8ulaobz5p513g7q9y90.jpg)